 One of the most popular features of C-MAP Genesis is Social Map, an online database of FREE downloadable maps for waterbodies close to home, across the country and around the world. This article will teach you how to find maps of the waterbodies you’re interested in and how to download those maps for use on the water in your compatible* sonar/GPS device.
If you’re new to C-MAP Genesis, the first thing you might want to do is check if any of your favorite waterbodies have already been surveyed and have a chart available for free download from Social Map.
How to search for maps to download for FREE from Social Map
Some waterbodies have already been completely mapped by community-minded anglers, others are partially mapped, and some remain a blank slate, ready to be mapped. On the Social Map, online at www.genesismaps.com, waterbodies that are completely mapped feature charts with entirely blue-shaded depth areas — darker blue denotes deeper water; lighter blue indicates shallower water. On many waterbodies that are partially mapped, you will see both blue-shaded depth areas and gray-shaded depth areas.
The blue-shaded areas are those that have been mapped with C-MAP Genesis, so those areas will appear in very high detail (usually with 2- to 5-foot contours, although shallower waterbodies can appear with 1-foot contours, and very deep waterbodies might display with 10-foot contours).
The gray-scaled contours on Social Map charts appear in areas where the C-MAP Insight basemap has not yet been improved by custom contour mapping with C-MAP Genesis. When you and others record and upload sonar logs of boat trips in those gray-scale areas, you can replace the less-detailed gray-shaded contours with highly detailed blue-shaded C-MAP Genesis contours, and eventually create an entirely new, and amazingly accurate, map for the water body.
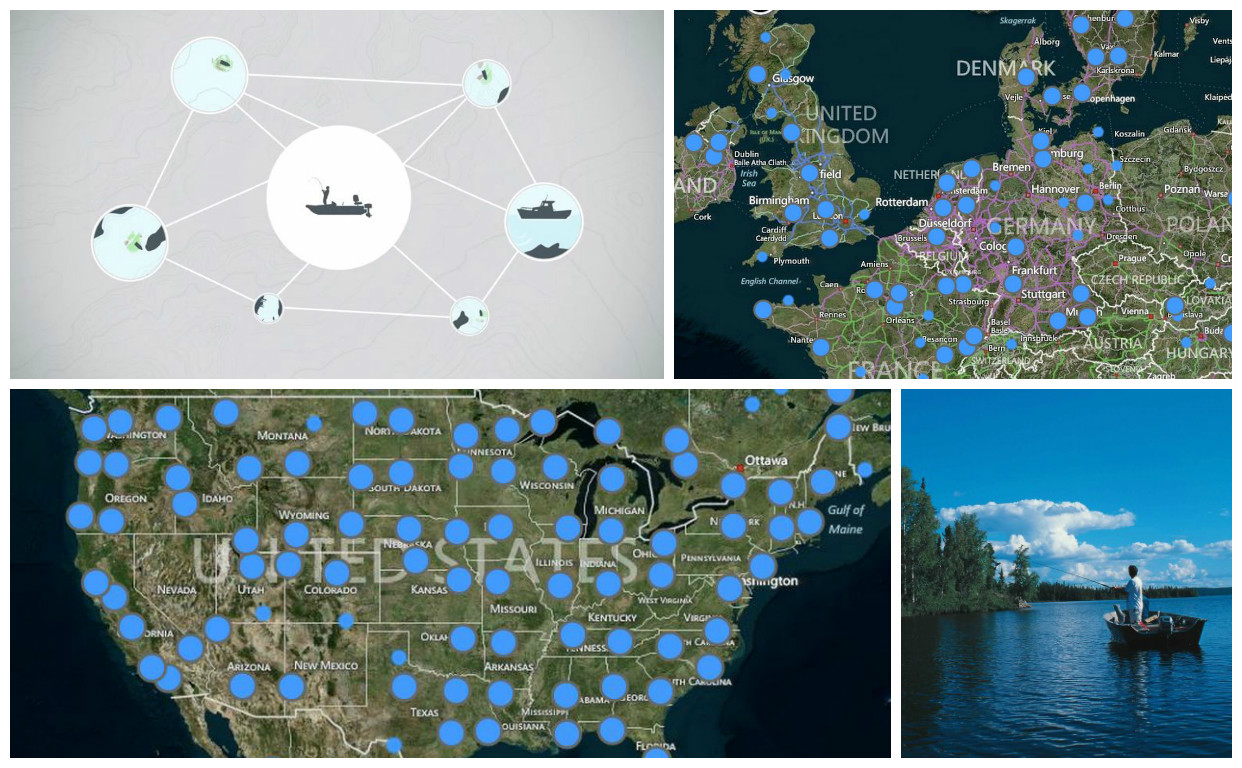
Each blue dot indicates a waterbody mapped with C-MAP Genesis.

Zoom in on a blue dot and click to see and download the map for free.
In some cases, however, a waterbody is so far off the beaten path that there exists no basemap for it at all — these are the types of waterbodies for which C-MAP Genesis was created! For if wasn’t for the DIY capabilities of C-MAP Genesis, these waterbodies might never be mapped at all.
Follow the steps below to search the vast Social Map for a community-sourced chart of your favorite waterbody. (Article continues after the image below)
- 1. Log in to your C-MAP Genesis dashboard following the step-by-step instructions above
- 2. Navigate your cursor to the left-hand side of your C-MAP Genesis dashboard screen and click on the text “List of Social Maps” (see the image above)
- “List of Social Maps” will be the second listing underneath the heading “SOCIAL MAP/view and download social maps”
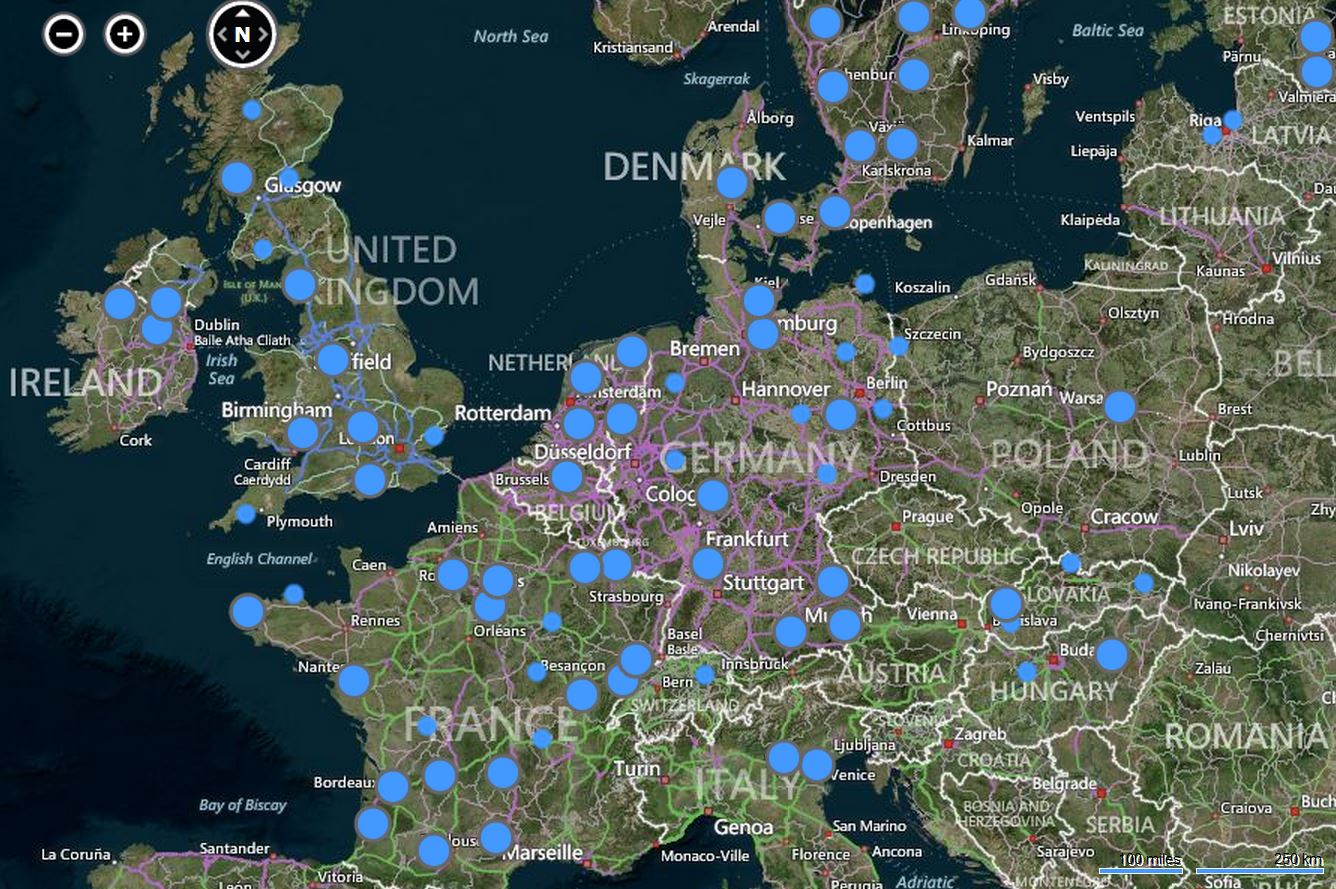
- The first listing under “SOCIAL MAP/view download social maps” is “Social Map.” By clicking this link, you will access an interactive map of all the waterbodies in the world for which there is an C-MAP Genesis Social Map chart. Each blue dot you see represents a waterbody with a Social Map chart — click the dot to view the chart
- “List of Social Maps” will be the second listing underneath the heading “SOCIAL MAP/view and download social maps”
- 3. After clicking “List of Social Maps,” look to the far-right side of the screen and type into the empty “QUICK SEARCH” field the name of the waterbody in which you are interested, and then click “Search”
- You could also scroll down the page, but the waterbodies are grouped by country, alphabetically, so unless you’re looking for a waterbody in Angola or Australia, you’ll find the “QUICK SEARCH” function must faster!
- 4. If a Social Map chart exists of your requested waterbody, it’s name will appear as a blue-text link underneath the name of the country and state/province/etc in which it is located. Simply click on the name of the waterbody to open the chart
- Note: If your search returns no results, consult Google quickly to ensure that you spelled the waterbody’s name correctly
- 5. When the Social Map chart for your requested waterbody first loads, you will see in the upper left-hand side of the screen a gray box with the heading “Download Queue,” followed by:
-
- Your waterbody’s name
- A drop-down menu for choosing the contour interval for your map; a drop-down menu for choosing the sonar/GPS unit on which you will use your map
- A button labeled “Download Map”
- If at this time, you are interested only in looking at the map online, simply click the blue “X” located directly to the left of the waterbody name and the gray box will disappear
- After clicking the X, you can use the plus (+) and minus (-) buttons to zoom in and out of areas of interest on your map
- To adjust your map’s position in the dashboard window, press and hold the left-click button on your mouse and navigate your mouse in the direction you want to move
- Using a laptop without a mouse?
- Press and hold the left-click button on your touchpad with your thumb and move your index finger on your touchpad in the direction you want to move
- Using a laptop without a mouse?
- Note: When reviewing a Social Map chart online, you will not be able to adjust the contour intervals at which the map displays (the waterbody’s maximum depth determines, by default, whether contours will appear with 1-foot, 2-foot, 5-foot or 10-foot contours.)
- Social Map charts of lakes in the American state of Florida, for example will almost always appear with 1-foot contours.
- Social Map charts for Norway’s extremely deep fjords, on the other hand, will generally default to 5-foot or 10-foot contours.
- However, when you download a chart file from the Social Map to use on your Lowrance, Simrad or B&G sonar/GPS unit, you can choose a more-detailed contour level than what appears in Social Map online
- Also, when you record and upload sonar data from your own boat on these same water bodies, you can create maps with a more-detailed contour level (1-foot contours, 3-foot or 5-foot).
- To adjust your map’s position in the dashboard window, press and hold the left-click button on your mouse and navigate your mouse in the direction you want to move
- After clicking the X, you can use the plus (+) and minus (-) buttons to zoom in and out of areas of interest on your map
-
How to download a FREE Social Map chart
To download a Social Map chart that you can use on your Lowrance, Simrad or B&G sonar/GPS unit, follow these instructions:
- Start by inserting a blank SD card into your computer’s card-reader slot
- If your computer does not have an SD-card slot, you will need to purchase an external card reader that plugs into a USB slot on your computer
- If you are using an HDS Gen3 or an Elite unit, you must first insert a MicroSD card into the empty slot in an SD-card adaptor, or use a USB-slot adaptor that will accommodate a microSD card
- Direct your attention to the gray box in the upper left-hand side of the screen with the heading “Download Queue”
- In the drop-down menu directly underneath the waterbody’s name, choose how precise you’d like your contours to be on your onboard map. Your choices are 1-foot, 3-foot, 5-foot or 10-foot.
- In the next drop-down menu, select the sonar/GPS sonar unit, AKA “plotter,” in which you will use your downloaded map
- Haven’t registered your sonar/GPS sonar units (AKA “chartplotters,” “MFDs,” “plotters”) yet? Click HERE for step-by-step instructions.
- Next, click the gray button marked “Download Map.”
- While the map file is downloading, you’ll see a rotating progress icon in a blue box above the text “NOTE: Large waterbodies may take a minute to generate.”
- Once the progress icon stops rotating, you will get the message “Social Map generated…” and a button labeled “Save File” will appear. Click that button.
- If you’re using a PC, after clicking “Save File,” a box will open allowing you to choose where you want to save the file
- Choose “SD (D:)” — you’ll see it listed under “Computer” in a vertical menu of options to the left-hand side of the window that opened
- Type in the name of the waterbody
- Don’t make any changes in the next field, “Save as type” — leave it as is
- Click the “Save” button
- If you’re using a PC, after clicking “Save” a box will open allowing you to choose where you want to save the file
- Choose “SD (D:)” — you’ll see it listed under “Computer” in a vertical menu of options to the left-hand side of the window that opened
- Type in the name of the waterbody and, if applicable, what additional layer it contains, like this: “Long_Lake-with-bottom_hardness.exe”
- Click the “Save” button
- If your web browser is Chrome (which we recommend) you will most likely see, in the bottom left-hand corner of your dashboard, a small, red circle with a white dash in it, next to a message like this: “Long_Lake-with-bottom_hardness.exe is not commony downloaded and could be dangerous”
- To the right of that will be a white button labeled “Discard” — do NOT click that button
- To the right of that “Discard” button will be a small down-pointing arrow. Click it to open a dropdown then hover down to and click the word “Keep” … proceed now to Step #13 below
- If you’re using a Mac, as soon as you click “Save File,” a compressed/zipped folder containing your map files will download to a pre-ordained spot on your computer, most likely your “Downloads” folder
- If you have not manually re-set your downloads to be saved somewhere else, it’s going to be in your “Downloads” folder
- The folder that downloads WILL NOT display the name of the waterbody — it will be named like this: “SocialMap_1234567.zip (the number will be different for every waterbody)
- You should re-name that folder now with the name of the waterbody
- If you’re using a PC, after clicking “Save” a box will open allowing you to choose where you want to save the file
- Before your map files will work in the Lowrance, Simrad or B&G sonar/GPS unit(s) on your boat, you must first extract the files (PC terminology) from the downloaded .exe folder/file or unzip the folder (Mac terminology) in which the map files are located.
- Depending on what kind of computer you are using, follow the PC-file-extraction or Mac-file-unzipping directions at the bottom of the page and then proceed to step #13 below
- Remove your SD card from your computer’s SD-card slot
- Insert your SD card into a card slot on your Lowrance, Simrad or B&G sonar/GPS unit while the unit is turned off
- If you have a unit with two card slots, it does not matter if you use the top or bottom, or right or left slot
- Turn on your sonar/GPS unit
- Soon after your unit powers up, a dialog box will open and ask if you want to load the map that you saved onto your SD card — it will reference the waterbody by name
- On a HDS Gen2 Touch unit or on an HDS Gen3 unit, simply touch the button that is labeled “Yes”
- On non-Touch Gen 2 units and Elite units, press the appropriately pointed arrow on the circular keypad in order to move your cursor to “Yes”
- Once “Yes” is highlighted, click the button labeled “Enter”
- Your map will then almost immediately load onto your unit’s map-display screen for your review
- Study your map and pilot you boat to where you’d like to fish
PC instructions: Extracting your map files
If your computer is a PC, follow these steps to extract your map files from the .exe file/folder you downloaded and saved to blank SD card
- Double-click the .exe file that you downloaded/saved to the blank SD card in your (D:) drive
- After double-clicking, a dialog box will open — just click the “Enter” button on your keyboard (or, you could click the “Extract” button), and your map files will extract and save themselves onto your SD card
-
- A total of five (5) additional files will extract and save onto your SD card. In addition to the original file you downloaded (the one with the .exe extension), you will see new files labeled exactly like this (depending on whether you use a Lowrance HDS or Elite unit):
- at5.xml
- permits.txt
- HDS_Large.at5 (or Elite_Large.at5)
- HDS_Medium.at5 (or Elite_Medium.at5)
- HDS_Small.at5 (or Elite_Small.at5)
- A total of five (5) additional files will extract and save onto your SD card. In addition to the original file you downloaded (the one with the .exe extension), you will see new files labeled exactly like this (depending on whether you use a Lowrance HDS or Elite unit):
- ALL 5 of those files must be on your SD card for your map to display on your sonar/GPS unit.
-
- At this time, we recommend creating a new folder on your computer, naming it “Lake Map Downloads” (or similar) and then dragging the .exe file off of your SD card and into that folder.
- The .exe file is not necessary to display the maps once the file map files are extracted from it
- However, it’s a good idea to save the original .exe file for each map you download
- Because if you should ever misplace the card onto which you saved the five map files detailed above, you can re-extract those files back onto another SD card at a later date, without having to download a fresh .exe file
- This is an especially important back-up process if you are traveling to fish in a remote area in which you will not have Internet/wifi access
- Proceed to Step #13 above
Mac instructions: Unzipping your map files
If your computer is a Mac, follow these steps to unzip the folder you downloaded and access your map files:
- Depending on your Mac’s operating system, your map’s file folder might un-zip itself while downloading. If it doesn’t, proceed to step #2
- Double-click the zipped folder
- A progress bar will briefly appear on your screen as the folder un-zips. Once that progress bar disappears, your unzipped folder will appear in the same folder that the zipped folder is located (in most cases, your “Downloads” folder, as explained above previously)
- After making sure your SD card is inserted into your computer’s SD-card slot (or external card reader) find the icon for your SD card on your desktop and drag the five files in your unzipped folder onto your SD card
- Rather than dragging and dropping, you could also copy and paste the five files in your folder onto your SD card.
- The five files should be labeled exactly like this (depending on whether you use a Lowrance HDS or Elite unit):
- at5.xml
- permits.txt
- HDS_Large.at5 (or Elite_Large.at5)
- HDS_Medium.at5 (or Elite_Medium.at5)
- HDS_Small.at5 (or Elite_Small.at5)
- Proceed to Step #13 above
* To use C-MAP Genesis maps on the water, you’ll need a compatible Lowrance, Simrad or B&G chartplotter.


I came across this article while trying to resolve a problem I’m having with my Lowrance Hook 4 fish finder. My problems are when I load the five files onto my SD card and use the unit it does a reset. This only occurs if I have the chart page selected. If I select any other page I can at least power on the unit and use it normally for sonar operations. As soon as I select the chart page, the unit resets and will continue the reset loop until the unit is powered off. I have talked with Lowrance customer support and they believe I have a defective unit. I’m hoping not to have to send it back and be without the finder for a couple of weeks. Has anyone else experienced this problem?
Darrel
It certainly does sound as if your Hook unit has a hardware problem rather than a problem with the mapping software, as we have not received any similar feedback from other Insight Genesis users with Hook units.
Do the Hook 4 head units use a different file to the Elite 4 units?
Ie: Elite_Large.at5 should it say Hook_Large.at5? Thanks.
The naming convention for Insight Genesis map files for the Hook units is identical to the naming convention for the Elite HDI and Elite CHIRP units.
Is it possible to load multiple maps to a hook4 or 4Chirp?. I have trived and they seem to conflict. It have tried the posted step-by-step, yet anything failed the appear on the screen.
Thanks.
Hello
I do not work on my charplotter hook 4 .
I follow the steps above and turn on my hook 4 and did not appear any map … why ? I could say the solution?
Ismael: Are you attempting to download and use a free chart from Insight Genesis Social Map, or one of your own custom maps? — Greg H
I follow all the steps above and my lowrance hook4 maps do not work … what I can do?
Ismael: Are you attempting to download and use a free chart from Insight Genesis Social Map, or one of your own custom maps? — Greg H
I have the same issue with my hook 4. Last time I placed the files in folders, now I will try to place them in the root of the SD. Hopefully this will work.
Can I load multiple maps onto my micro SD card and if so how do I then access them on my unit
Jeff: If your sonar/GPS unit is an HDS or Elite Ti, the answer is yes. This article provides step-by-step instructions: https://insightgenesis.wordpress.com/2015/06/26/how-to-save-multiple-insight-genesis-maps-on-the-same-sd-card-new-feature/
Just down loaded my first map from free social page to my lowrance hook 5 map is there looks great !!!! Can’t wasit to get on the water !!! Thanks insight and all who contributed !!!
I have a Hook 2 unit and it never asks me if I want to “load the map saved on the SD card”. I can see the files on the card if I look in the menu. What am I missing?
Correct, the Hook 2 units do not display that prompt.
You need to have seperate folders on the sd card for each lake. Name/label the folder using the name of the lake. The unit will then prompt you folder by folder asking if you want to load it. Sometimes it gets confused and loads the wrong lake so you then have to re-start the unit.
Have a elite 7 HDI and understand it requires a micro card to utilize mapping. Currently the unit doesn’t have a transducer so my question surrounds best use age -should I buy transducer first and than install the micro card w genesis maps ??
Hi Pete: That shouldn’t matter. The transducer has no effect on use of the chart. Use a 32 GB card or smaller. And make sure the software has been updated to the latest version – https://downloads.lowrance.com/. Good Luck!
Hi! Followed the process for my Hook Reveal 7x Tripleshot but the maps are not loading. I verified that all 5 files are on the SD card and can be seen by the device. With the device on and at the GPS screen I select more options, Overlay, and select Genesis Live. From what I have read this should be all that is needed to populate the map but I am not seeing it. Is a GPS signal required for the map to load? Not sure what I am doing wrong.
Hi – Unfortunately the 7x only comes with a very basic GPS that allows for trail creation and waypoints but does not support charts, or maps from Genesis, or creating your own with Genesis Live. Depending on where you live, you would need to upgrade to a Reveal with a base chart in the title (e.g., US Inland, US/CAN Nav+). The “x” in the title indicates only basic GPS features.
It works completely different for me. I have uploaded several logs to the social maps, like a month ago, and none has been put to Social Maps for download. Also, when I choose some area and download it (btw. the file that downloads is a .zip file with several files inside with .at5 format). After puting it into the SD card nothing happens. I have a Hook Reveal 5
You need to copy the un-zipped folder (eg. Lake Bigfish) with all 5 files on the micro sd card. It won’t work if the 5 files aren’t in a folder. This also lets you save multiple lakes on the card at once. When the finder starts it will say “loading charts” and you can then pick the lake you want.
Good luck.